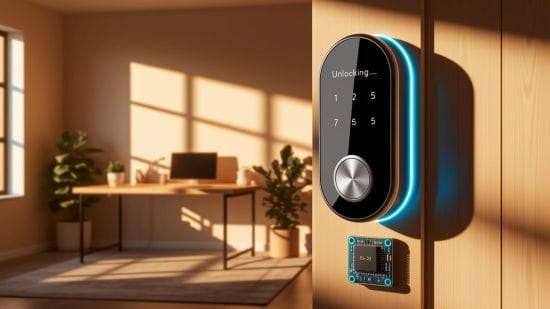
How to Make a Smart Door Lock with ESP32: Smart home projects are now easy and inexpensive. You are able to develop great tools from simple components. Example is very good it’s learning how to make smart door lock with ESP32. This gadget allows you to control your door wirelessly. You can also link it to other projects, such as cheap DIY home automation with Arduino or construct your smart mirror with Raspberry Pi.
If you’re facing network issues on Windows XP VirtualBox VM check out our guide to fix it. For email migration from Lotus Notes to Outlook without data loss see our Lotus Notes vs Outlook migration tips. If you’re looking for a tablet for seniors consider the best tablet for elderly with large fonts and easy apps to make tech easier.
Why I Prefer ESP32 for Smart Door Locks
ESP32 is ideal for smart homes systems. It has internal WiFi and Bluetooth. It has low power consumption. It works with Arduino IDE. It is able to read inputs from keypads, fingerprint sensors, apps. ESP32 also plays nice with cheap DIY home automation with Arduino. It is possible to link it to other systems without difficulty. You can even use it when you use Raspberry Pi and make your own smart mirror.
Components Needed for the Smart Lock
You will need the following parts to make your lock:
- ESP32 development board
- Solenoid or servo motor
- Relay module
- Jumper wires
- Power adapter
- Keypad or fingerprint scanner
- Push buttons
- Resistors and breadboard
- Optional OLED screen
Their parts are readily available at affordable price. They are also of value in other projects. For instance you can use the same relays and modules to build your own smart mirror based upon Raspberry Pi. The same is true for cheap DIY home automation using either Arduino or other devices. Smart Door Lock System Using ESP32.
Working of the Smart Door Locks.
The smart lock uses the control of power to a solenoid or servo motor. The ESP32 takes input from a keypad fingerprint reader or through a mobile application. Data is processed and a relay is activated. The relay opens or closes the lock. The configuration is similar to systems for cheap-do-it-yourself home automation using Arduino. You can also display on screen lock status as in build your own smart mirror with Raspberry Pi projects.
Setting Up the Circuit
They must be signalled corectly. Connect ESP32 to the relay. Then connect the relay with the lock motor. Add devices for inputs such as buttons or keypads. Use a power source with the capability on the load. Here is the basic setup:
- ESP32 3V3 to Relay VCC
- ESP32 GND to Relay GND
- ESP32 GPIO to Relay IN
- Relay NO to Lock Positive
- Lock Negative to GND
Use the same wiring logic that can be found in a cheap DIY home automation with Arduino. This arrangement is safe and are also easy to edit. It also nicely integrates with other systems if you build your own smart mirror using Raspberry Pi.
Programming the ESP32
Write and upload code through Arduino IDE. You must install ESP32 board packages. Then draw a sketch that receives input from your device and uses it to operate the relay.
int relayPin = 5;
int buttonPin = 4;

void setup() {
  pinMode(relayPin OUTPUT);
  pinMode(buttonPin INPUT_PULLUP);
}

void loop() {
  if (digitalRead(buttonPin) == LOW) {
    digitalWrite(relayPin HIGH);
    delay(3000);
    digitalWrite(relayPin LOW);
  }
}
This is a simple example. You can also extend it to use passwords of fingerprints or apps. The logic is the same as with cheap DIY home automation using Arduino. You can also show logs on a screen, if you build your own smart mirror with Raspberry Pi.
For teachers looking to enhance offline learning explore the best quiz apps for offline classrooms. If you’re into DIY projects try our guide on how to build your own smart mirror with Raspberry Pi. Finally if privacy is your concern learn how to self-host Bitwarden alternatives for better control.
Adding Mobile Control
You can attach a smartphone access with Blynk or MQTT. Create a dashboard with buttons. To lock or unlock the door, use your phone. Connect ESP32 to WiFi. Change your code to read app data. This setup improves flexibility. It is also popular among cheap DIY home automation using Arduino. The same approach is applied when you build your own smart mirror using Raspberry Pi.
Fingerprint and Keypad Options
There is a fingerprint module like R307 that you can add. You may also use a 4×4 keypad. Such devices offer a more secure access. Wire them to GPIO pins. Change the code so that it reads input values. This means that you have different approaches to unlock. Use the same modules in cheap do it yourself home automation with Arduino. They also work with displays if you have your own smart mirror, built with Raspberry Pi.
Creating a Smart Lock App
Use either Blynk or MIT App Inventor. Design a simple interface. Connect buttons to virtual pins. Program the relay to respond to button actions. This enables access from a remote location using your phone. This is something you can roll out across your entire home. These apps also integrate with inexpensive DIY home automation through Arduino. They are commonly shown in projects where you build your own smart mirror with Raspberry Pi.
Designing a 3D Printed Enclosure
Make a custom case to hold all components. Use Fusion 360 or Tinkercad. Print with PETG or ABS. Make sure to allow airflow. Secure the ESP32 and relay inside. Use strong screws to mount it to the door. This protects the circuit. You can use the same printer to build your own smart mirror with Raspberry Pi frames. 3D printing also helps cheap DIY home automation with Arduino projects.
Installing and Testing
Attach the lock system to your door. Connect the power. Upload the final code. Press buttons or scan fingerprints. Confirm the motor unlocks the door. Test app access and WiFi range. Make changes if needed. This setup can be reused in cheap DIY home automation with Arduino. You can also share results if you build your own smart mirror with Raspberry Pi.
Pros and Cons Table
| Pros | Cons |
|---|---|
| Low cost and customizable | Needs basic programming knowledge |
| Easy to expand with new features | May need soldering |
| Remote access via mobile | Requires stable power |
| Works with many smart projects | Lacks physical key backup |
| Reusable parts for other builds | Not weatherproof |
Enhancing Security
Add features to increase safety. Use encrypted WiFi. Add timeout for wrong codes. Use notifications. Connect camera feeds. Add emergency unlock. These solutions are all applied in cheap DIY home automation with Arduino. They are also present in systems where you would build your own smart mirror using Raspberry Pi.
Connecting to Google Assistant
Connect your ESP32 to Google Assistant by using IFTTT. Create webhooks. Control lock using applets from voice. Upgrade the ESP32 to take care of the requests. This gives you voice unlock. Combine with camera feeds. It operates similar to controls for build your own smart mirror with Raspberry Pi. Voice control is a household automation phenomenon popular in DIY cheap home automation using Arduino.
Energy Saving Tips
Ignore deep sleep mode when active. Power down screen and relay. Use sensors to wake ESP32. Install battery with solar charger. These help reduce costs. They find use in simple Arduino home automation. When creating a mirror of your own based on Raspberry Pi, use similar tips.
Troubleshooting Issues
Check power connections first. Confirm relay clicks. Use serial monitor to debug. Test GPIO pins. Recheck code logic. Replace faulty components. These steps are identical in cheap DIY home automation with Arduino. The same process is of use when you develop your own smart mirror using Raspberry Pi.
Sharing and Expanding Your Project
Share your build online. Join maker forums. Upload code and schematics. Find others building smart homes. Connect your lock with cameras lights and mirrors. This creates a smart ecosystem. The idea is the same as if you make your own smart mirror using Raspberry Pi. Or add to your cheap DIY home automation with Arduino.
Conclusion
Now you understand how to make a smart door lock with ESP32. You can build it using low cost components. You can integrate it with apps and voice commands. This lock works great with other smart systems. Reuse parts in cheap DIY home automation with Arduino. Also combine with tools if you build your own smart mirror with Raspberry Pi. This gives you full control security and customization.
FAQs
Can I power the lock with batteries?
Yes but use a stable battery pack. Add a recharge system.
How secure is the ESP32 lock system?
It is secure if you use encrypted communication and safe input methods.
Can I use RFID instead of keypad?
Yes just connect an RFID module and update your code.
Will it work without internet?
Yes use offline input methods like keypad or fingerprint sensor.
Can I link this with smart mirrors or other systems?
Yes it integrates well if you build your own smart mirror with Raspberry Pi or use cheap DIY home automation with Arduino.